S3 is a convenient storage area for any non-structured data you may need for your app. It’s fast, easy, and convenient to use, but getting the bucket setup correctly and the read/write code to work takes a little effort.
Anxious? Want to just get the code and go? Here’s a gist.
Bucket Setup
The first thing to do is create your S3 bucket to hold the data. I like to create a bucket per application then add folders to organize the data, but creating separate buckets if also an option. The thing to consider is that permissions are granted by bucket so if someone has access to a bucket they have access to all folders in that bucket. If you have data that needs different access permissions you need different buckets.
Go to the S3 console and press Create Bucket.

Set the Bucket Name and AWS Region, then click Create Bucket. You can leave all the options at their default values.
Make note of the region since you will need it in the code later.

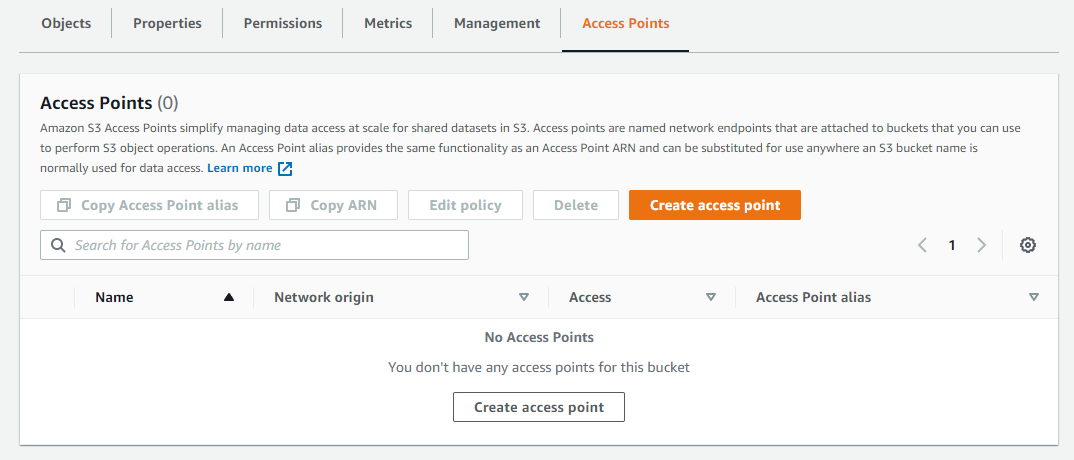
Click on the new bucket to edit the settings, then go to Access Points.
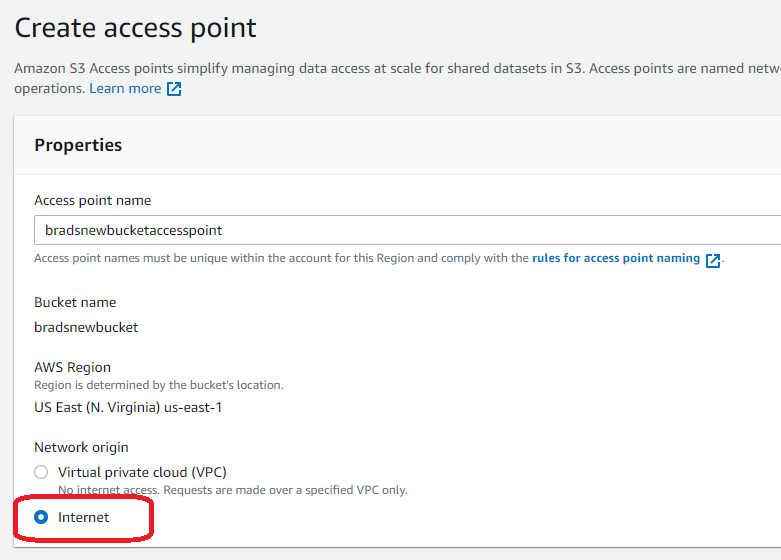
Create the new access point. You can take the defaults except for the Network origin which must be Internet. When you’re done click Create Access Point.
Make note of the Access Point Alias. This is what you will use for accessing the data, not the name of the access point itself.
Permissions
So now we have a bucket but your code cannot access it until we setup permissions. We access the data using an AccessKey and SecretKey generated in the Identity and Access Management console. If you already have an AccessKey and SecretKey for an existing user you can use those, just make sure it has sufficient S3 permissions. To read and write data you need AmazonS3FullAccess permissions attached to the user.
If you do not have a user or want to create a new one, keep reading.
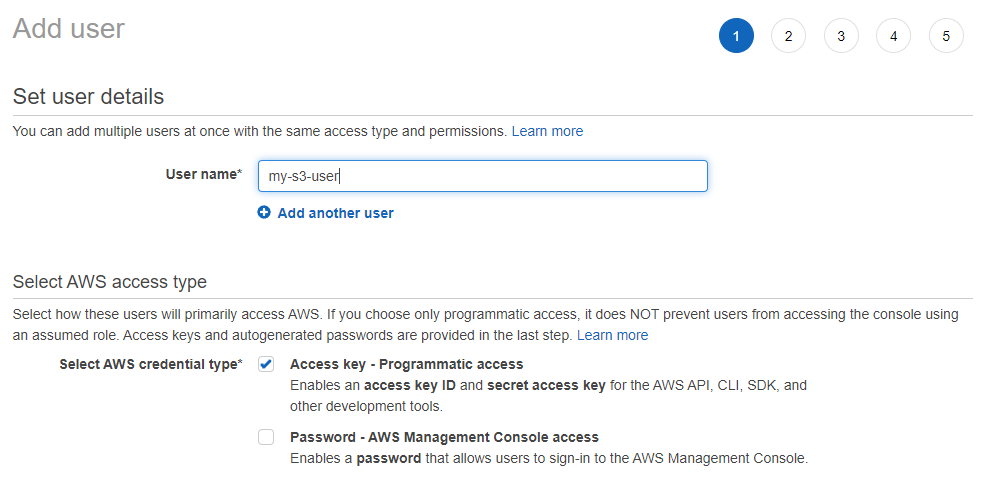
Go to the Users tab of the IAM console and click Add Users.
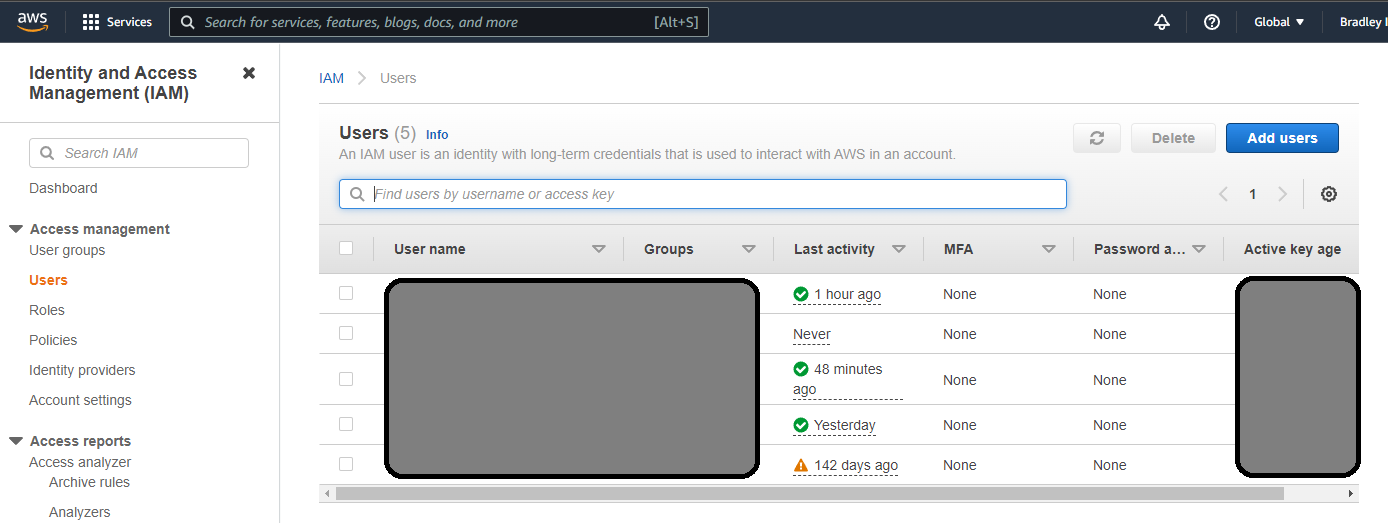
Add the username and check the Access Key option.
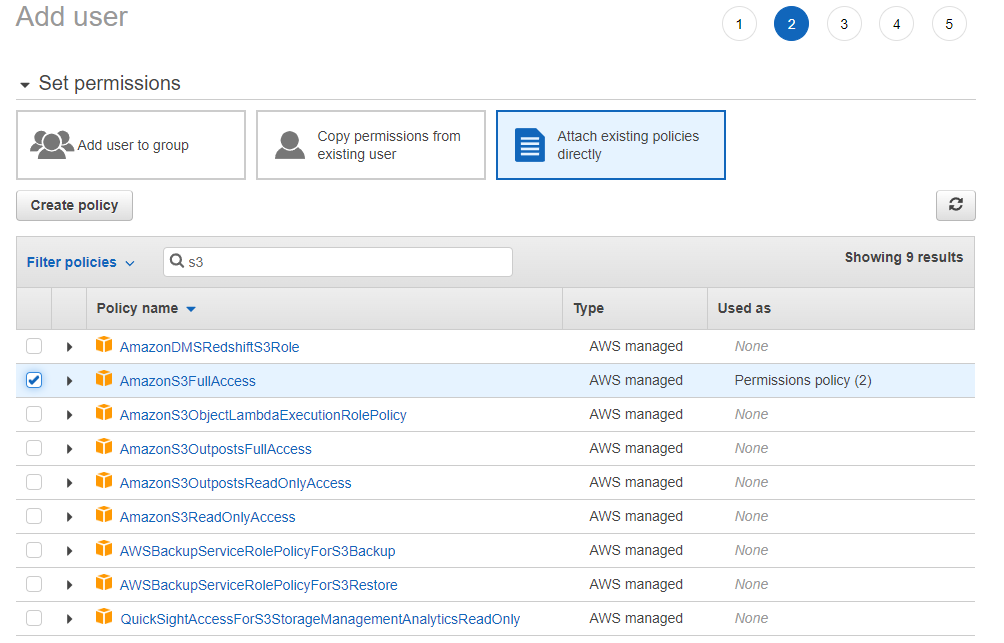
Choose Attach Existing Policies Directly and set the necessary permissions. Choose the most restrictive option you can while still getting the job done. Since we are reading and writing we will choose full access.
Click through the next few screens and create the user.
The final screen will give you the AccessKey and SecretKey you need. This is the only time you will ever see the SecretKey so download the CSV and save it off someplace secure.

Accessing the Data
Now that the bucket is setup and we have access, we can move to the code that accesses the data.
For security reasons, we are going to put our AccessKey and SecretKey in environment variables and read from there. If you are setting up a Lambda that needs access to S3, you can set environment variables for the Lambda as well.
Note that you will need to install the Amazon SDK for this code to work.
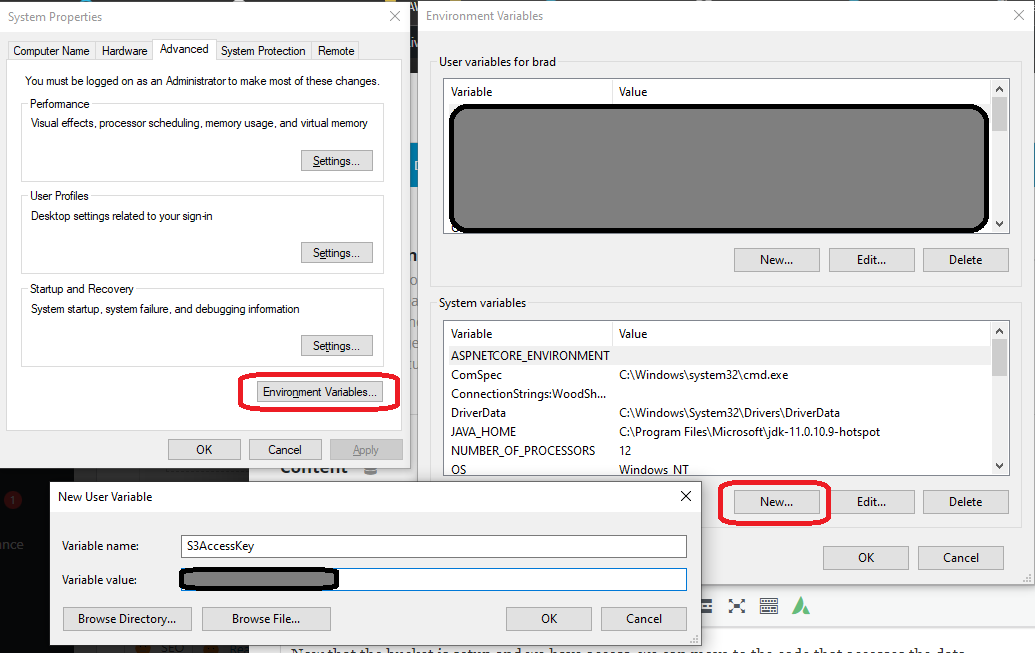
On Windows you can set the environment variable by pressing Start and typing “env”. That will find the environment variable editor, and you can add the entries by pressing Environment Variables -> New.
If you are using Visual Studio remember you must exit and restart to access these new variables. This is probably true for VSCode and other editors as well.
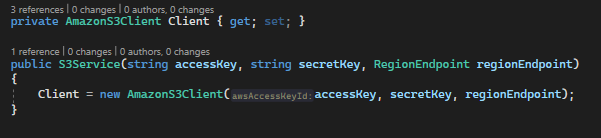
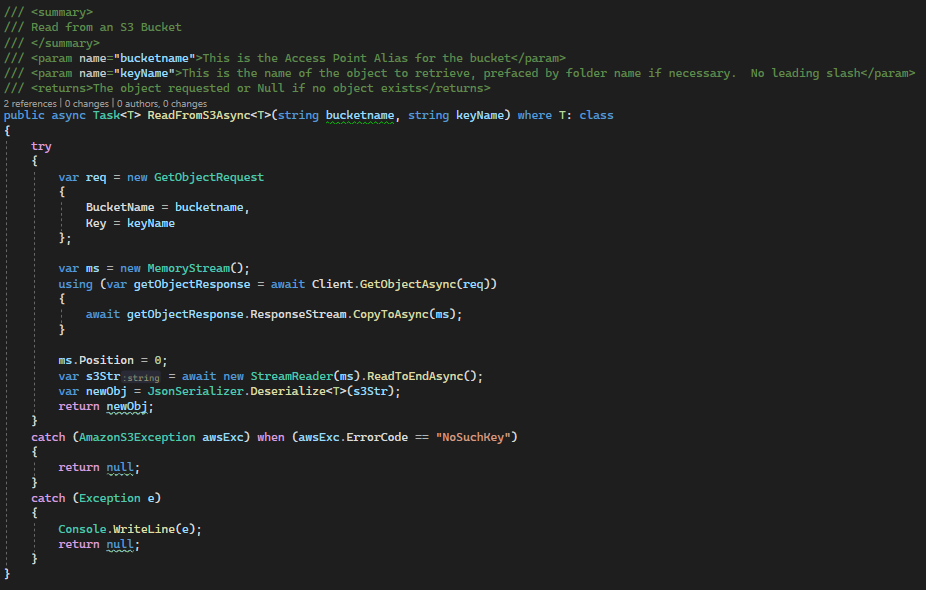
I use a separate service for accessing S3 so I can inject it where I need it. In the service there are only 2 methods and a constructor.
The constructor looks like this. It just creates an AmazonS3Client for use by the methods that read and write the data. The accessKey and secretKey parameters are the ones we just created, and the regionEndpoint is where you created your bucket.
The read method takes the Access Point Alias we created earlier and the name of the object we want to read. Assuming the S3 file is json for an object, I also deserialize the json into the proper object.
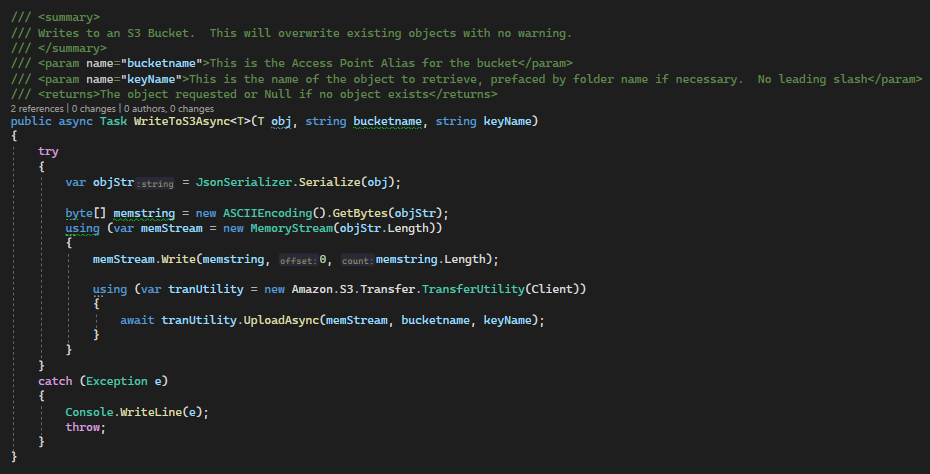
The write method takes similar params in addition to the object to write.
And finally, here is a test that will read the object from S3, update it, then write it back.
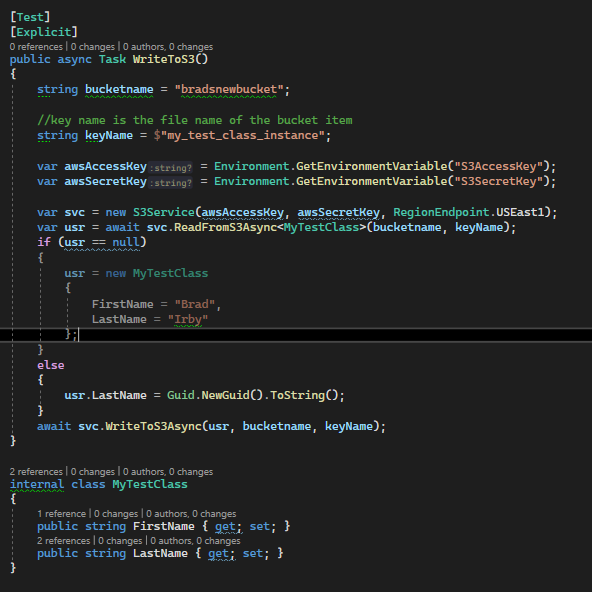
You can check to see if the test worked by going to your bucket, click on the file name, and download.
If you don’t like to type, here is a gist with the code above.
Leave A Comment