Getting started with a new Alexa skill is not complicated but the lifecycle of a skill is different than for normal development. It is easy to make missteps that can lead to problems after release. If not done correctly fixing small bugs in production can turn into a much bigger effort than necessary, and you also run the risk of accidentally overlaying production code with test code.
This is a lifecycle that has proven itself over the years to be flexible yet not too formal. It is meant for a development process with no dedicated QA resources so if you are a solo developer and also do your own testing, this is the process for you.
Creating the Alexa Skill
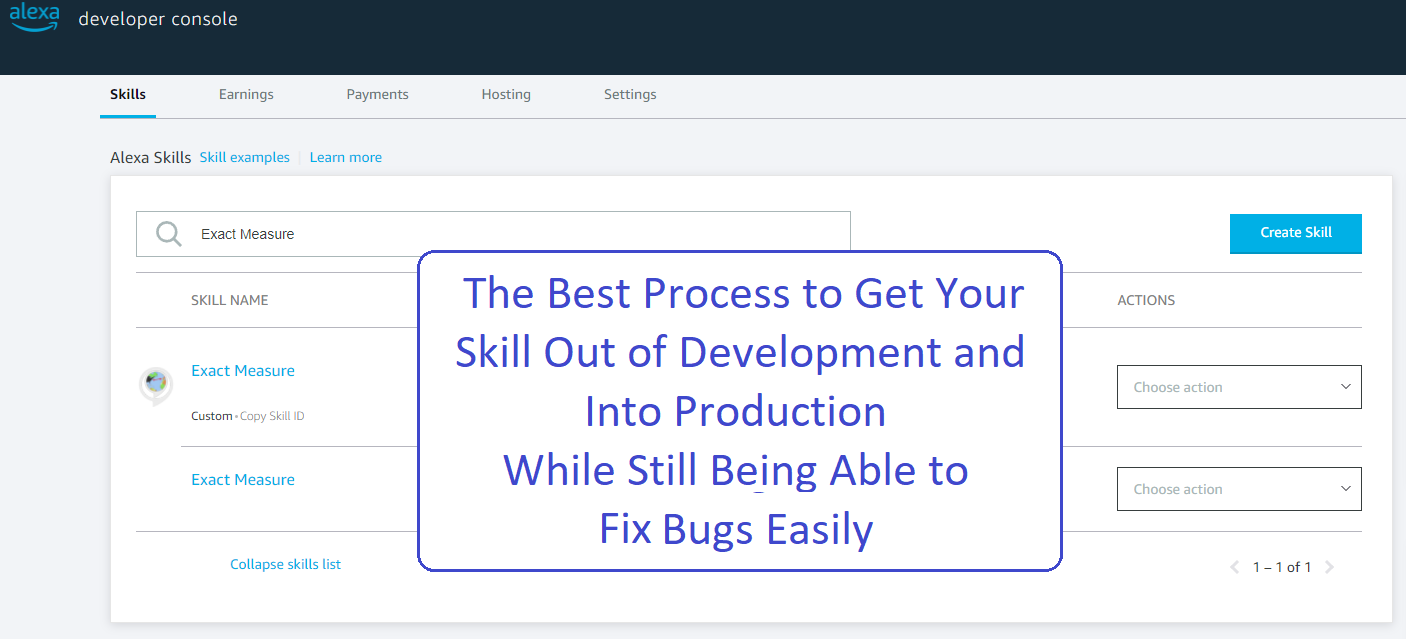
We are going to go through the lifecycle I use for my production Alexa Skill Exact Measure, including how I first created the skill and how I do ongoing maintenance and feature releases.
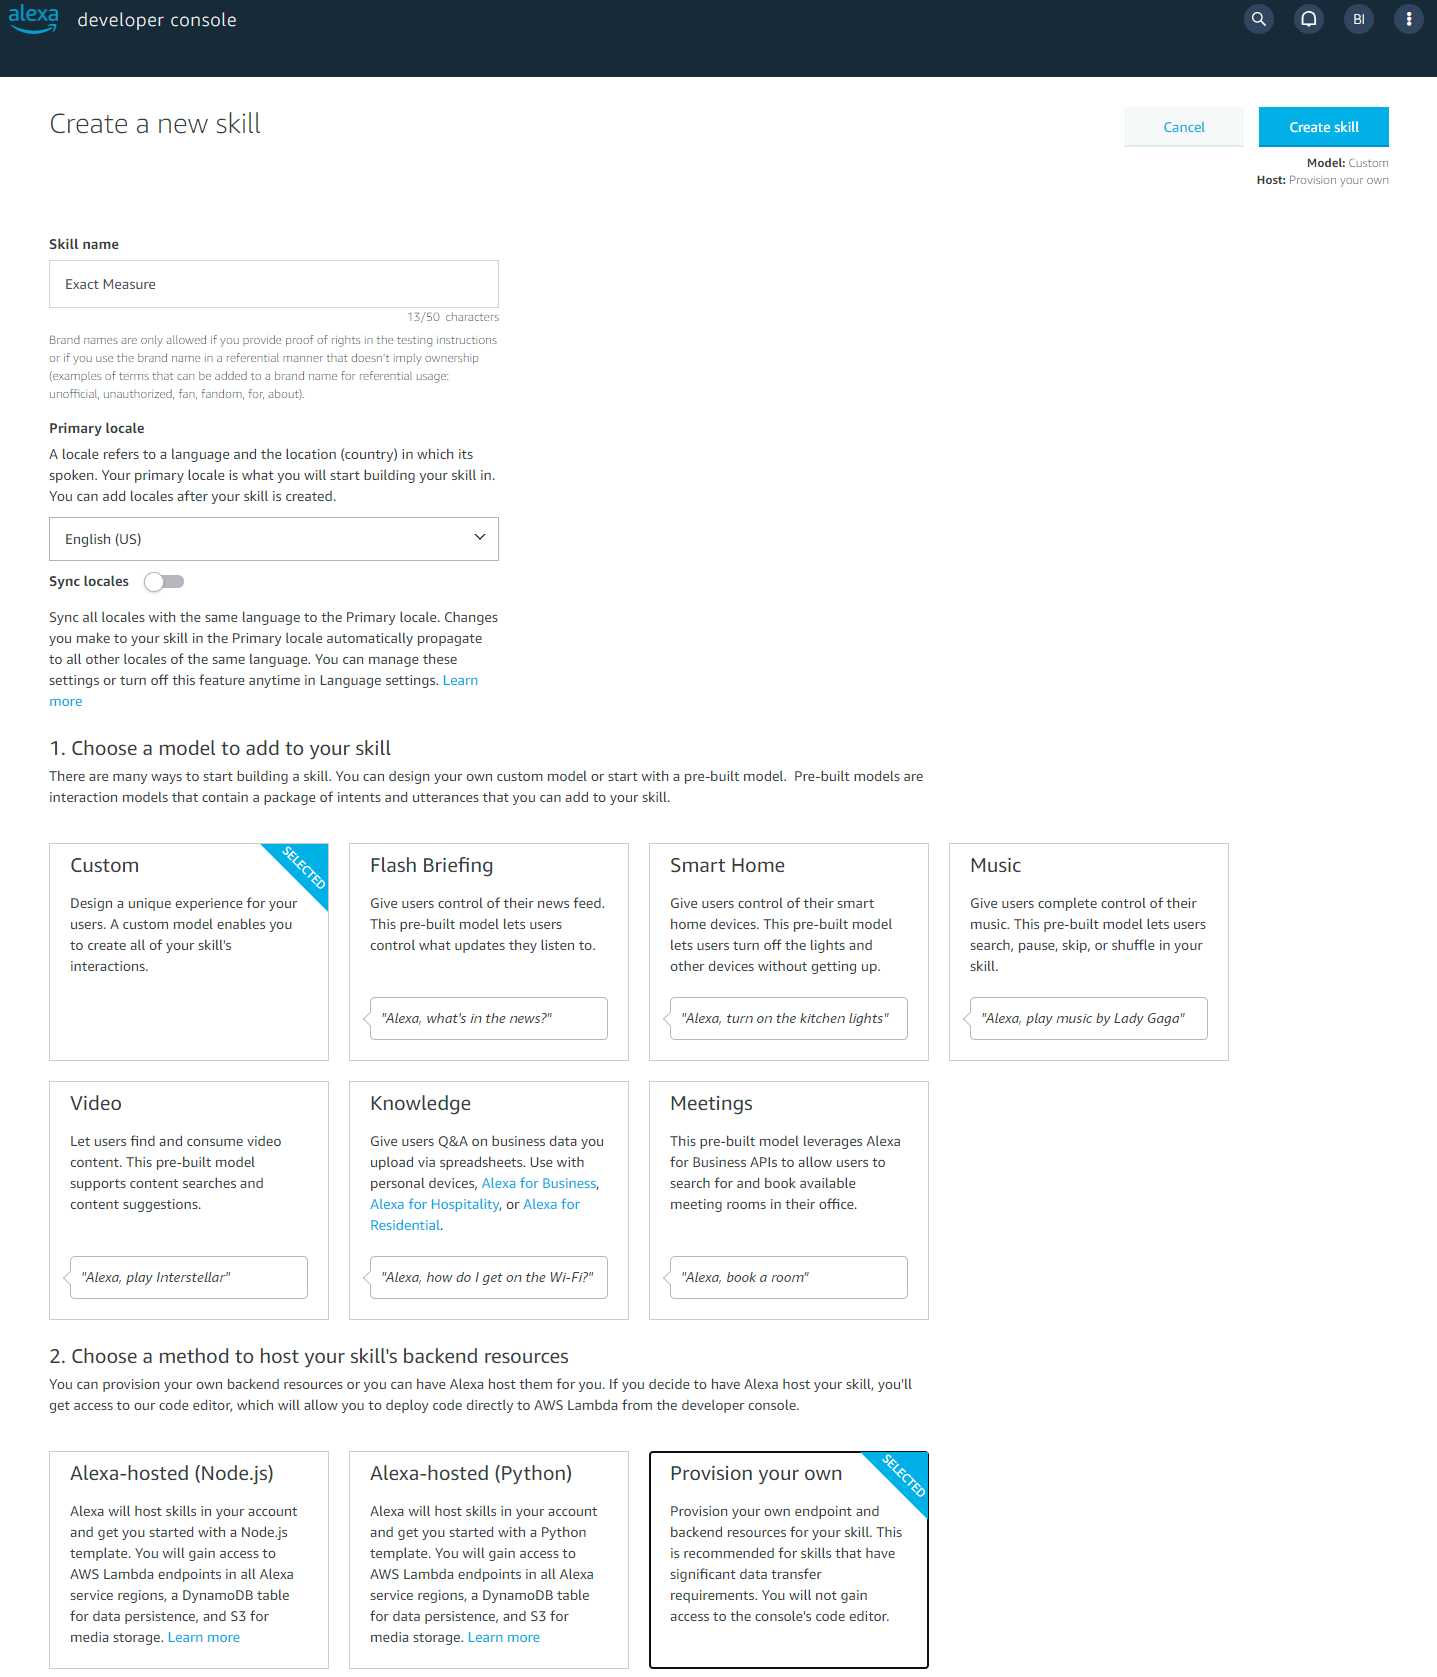
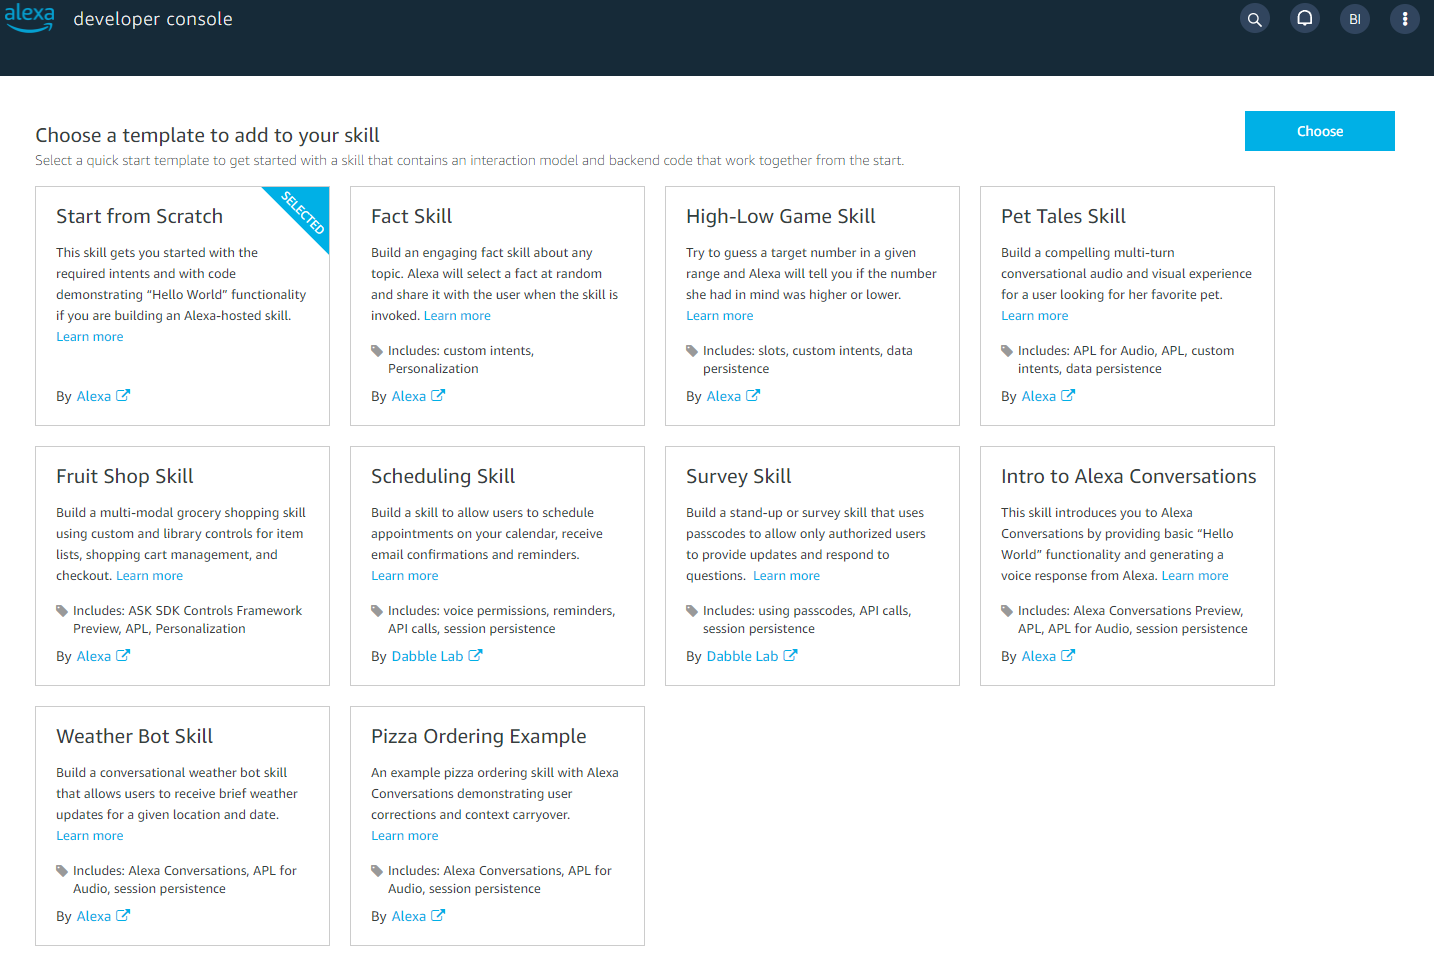
First we create our new Alexa Skill. Open the Alexa Console and click the “Create Skill” button. For this exercise we will choose a custom skill and to provision our own and to start from scratch.
Creating the Lambda
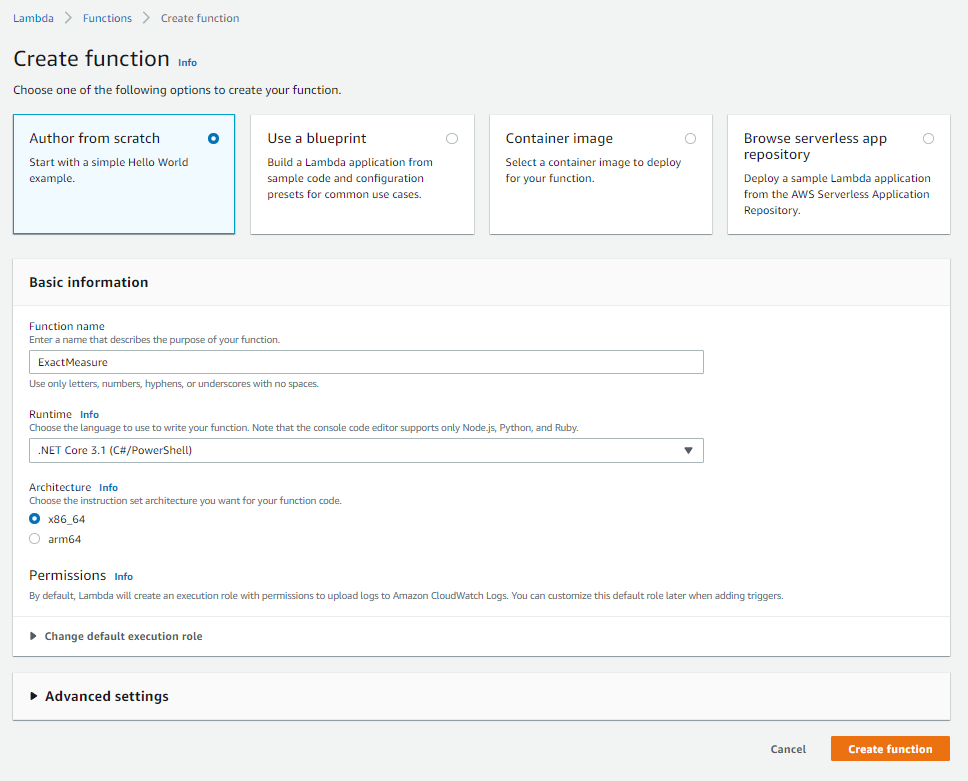
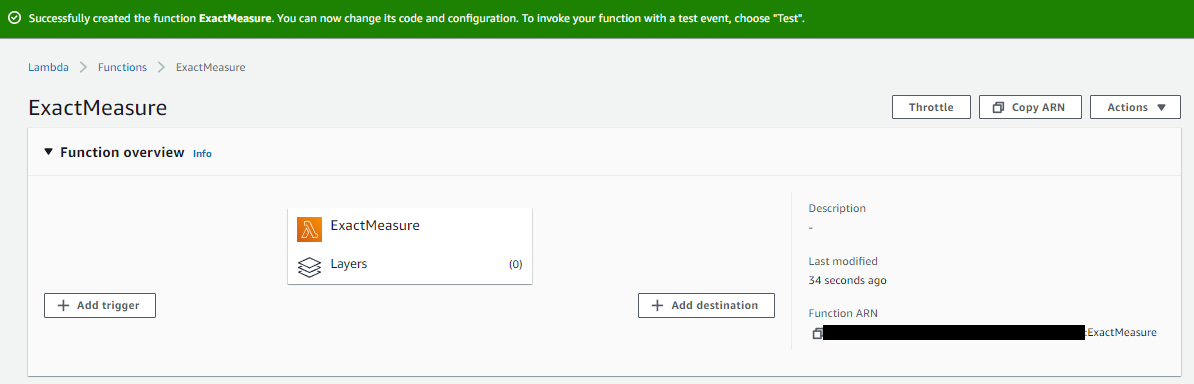
Now we create our new Lambda by opening your Lambda Home page and press “Create function” to get the screen shown below. Configure your Lambda appropriately and press Create.
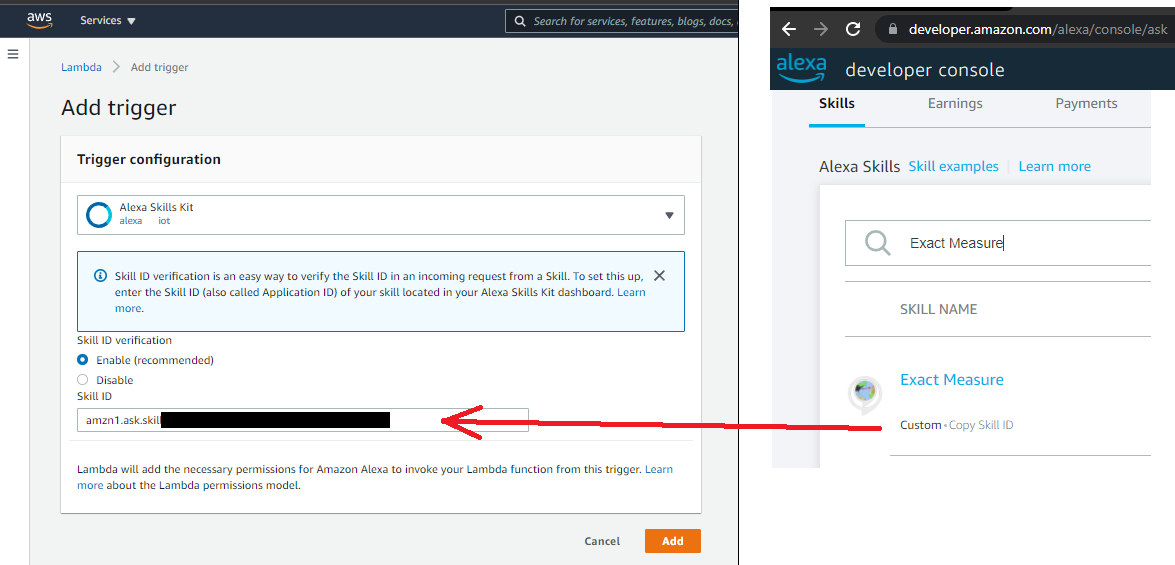
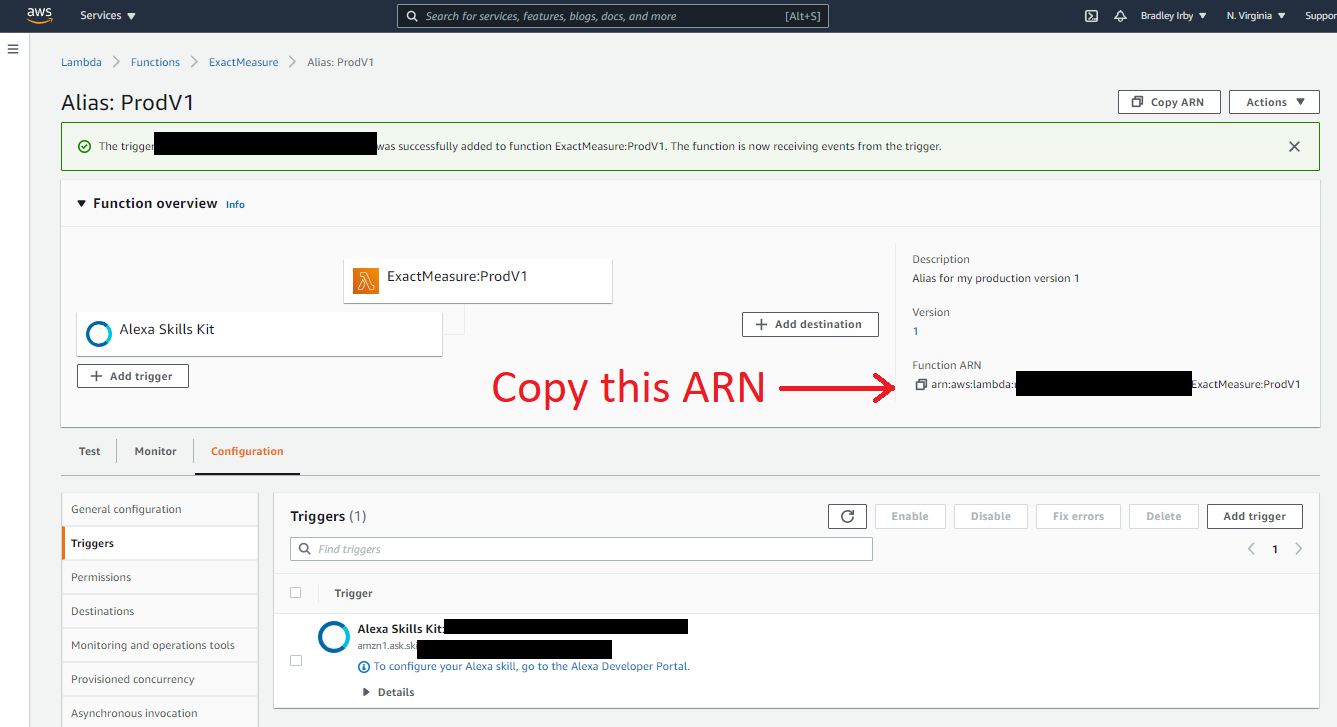
Once the Lambda is created you need to add a trigger that it can respond to. Click the Add Trigger button and choose the Alexa Skills Kit trigger.
It is best to keep the Skill ID Verification turned on because this limits calls to this Lambda to only those coming from your Alexa skill. You can get your Skill ID from the Alexa Developer Console. If you are just playing around, though, you can Disable the Skill ID verification.
Copy the Function ARN for the Lambda because you will need it in the next step.
Finish setting up the Alexa Skill
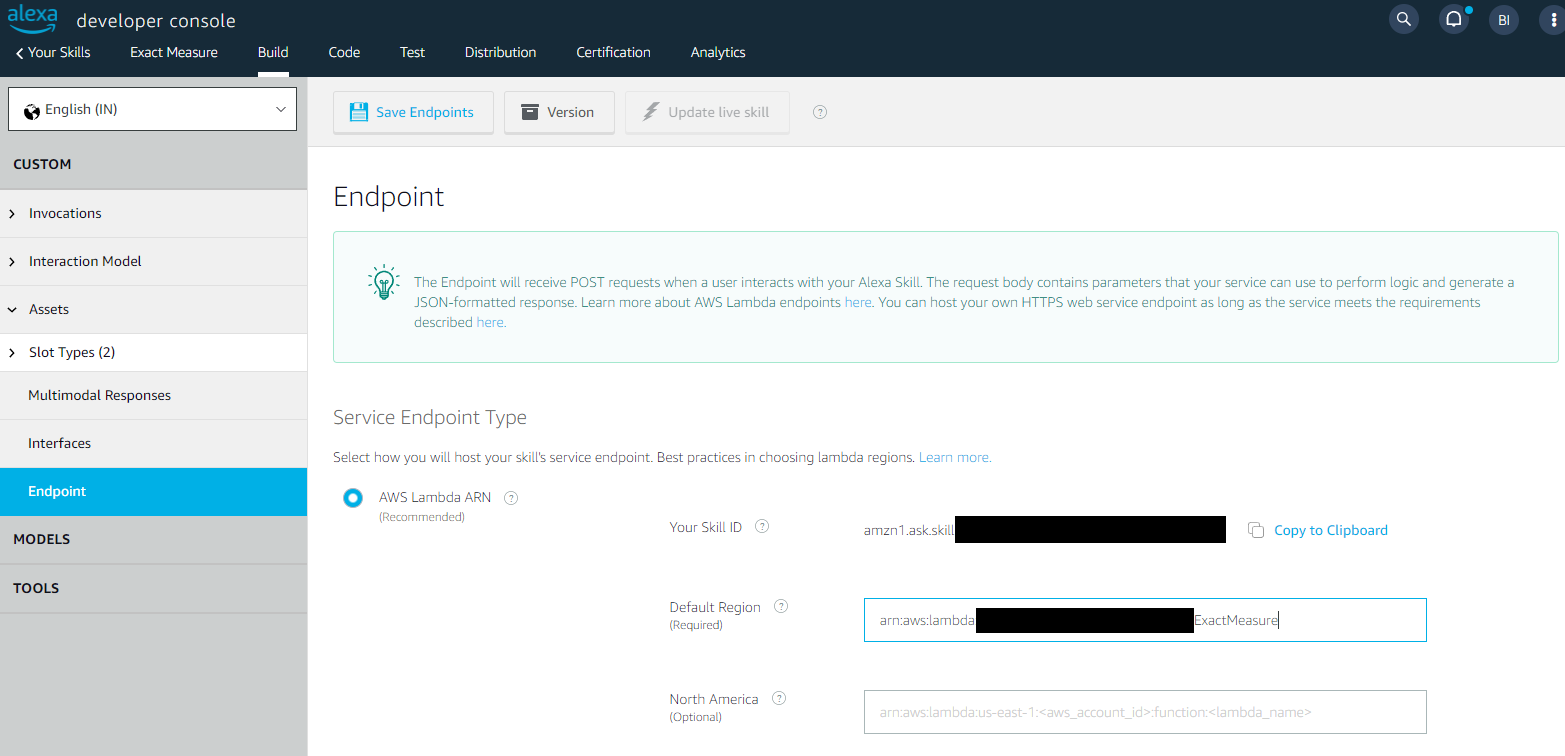
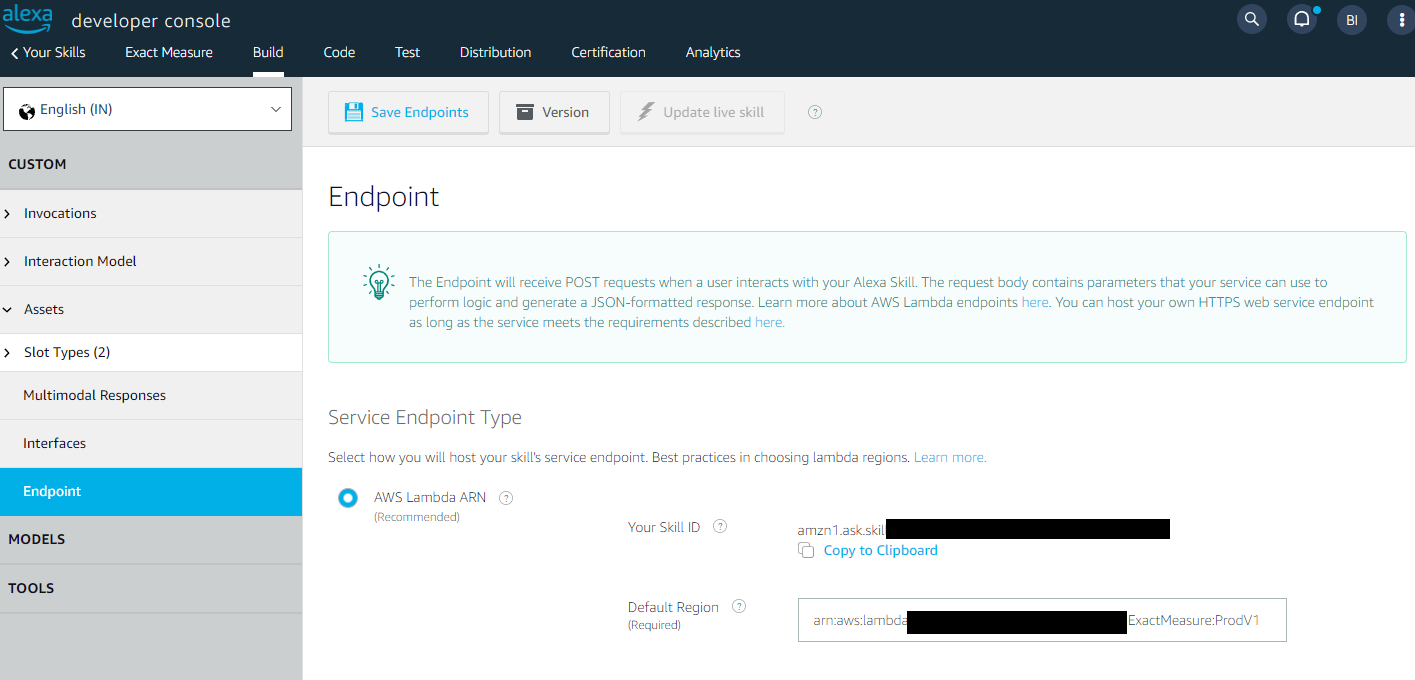
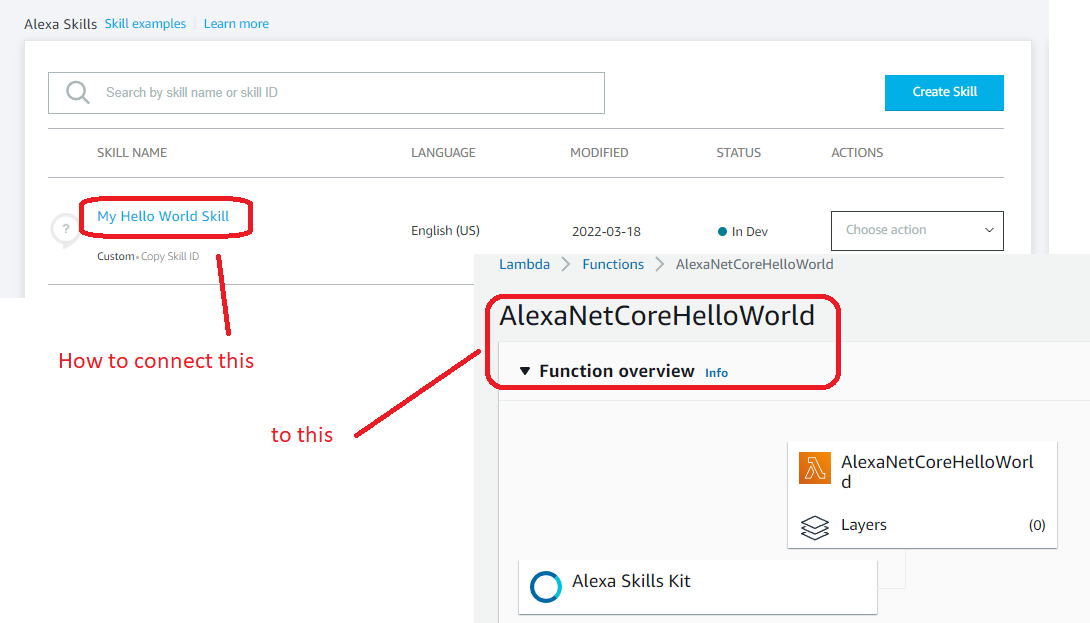
Now that your Lambda is created and configured to accept Alexa Skill requests, you need to connect your skill to the Lambda so Alexa knows where to send the requests. Return to your Alexa Console and edit your new skill. Go to the Endpoint configuration screen and add the Lambda endpoint. The Endpoint can be found in the Lambda admin screen.
You are now ready to publish code and test your skill.
Pushing to Production
Once you have your skill working correctly, you are ready for the “go live” part of the lifecycle. Up to this point you have been developing and testing with the dev version of your Lambda, called $Latest. You could go live with your skill pointing to this version but then you cannot update your Lambda with new code without changing production. To get around this we create a new version of the Lambda we can use that will stay static through the continuing development process.
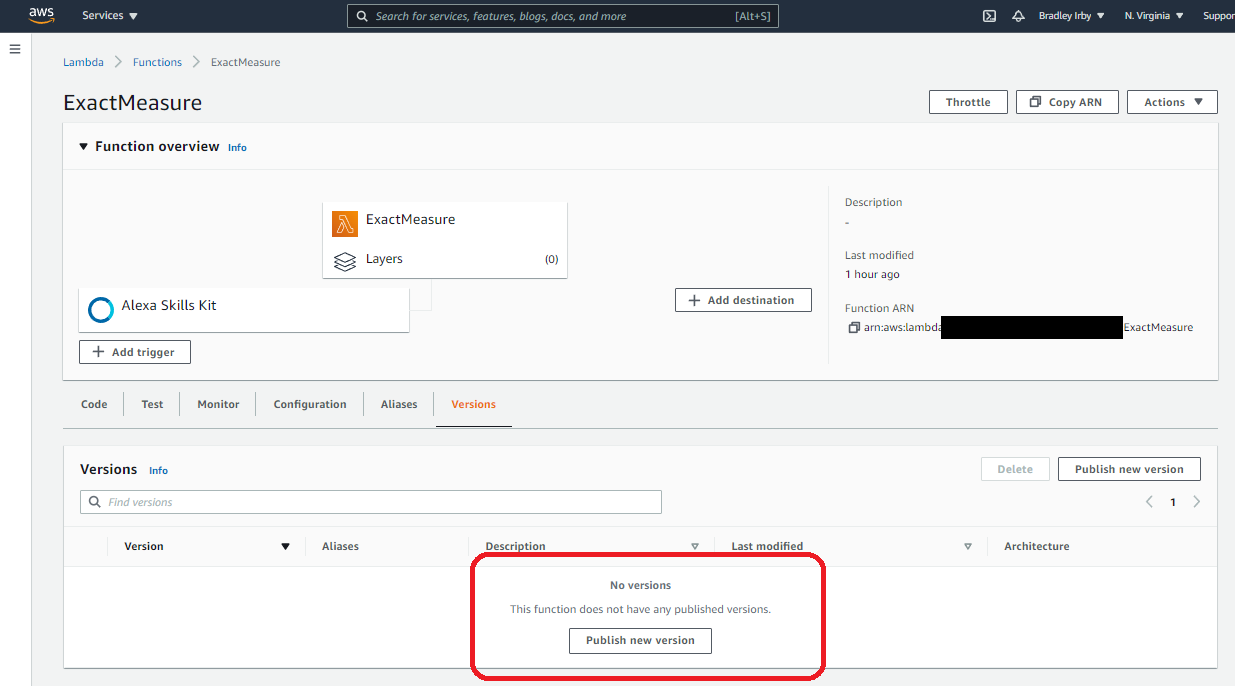
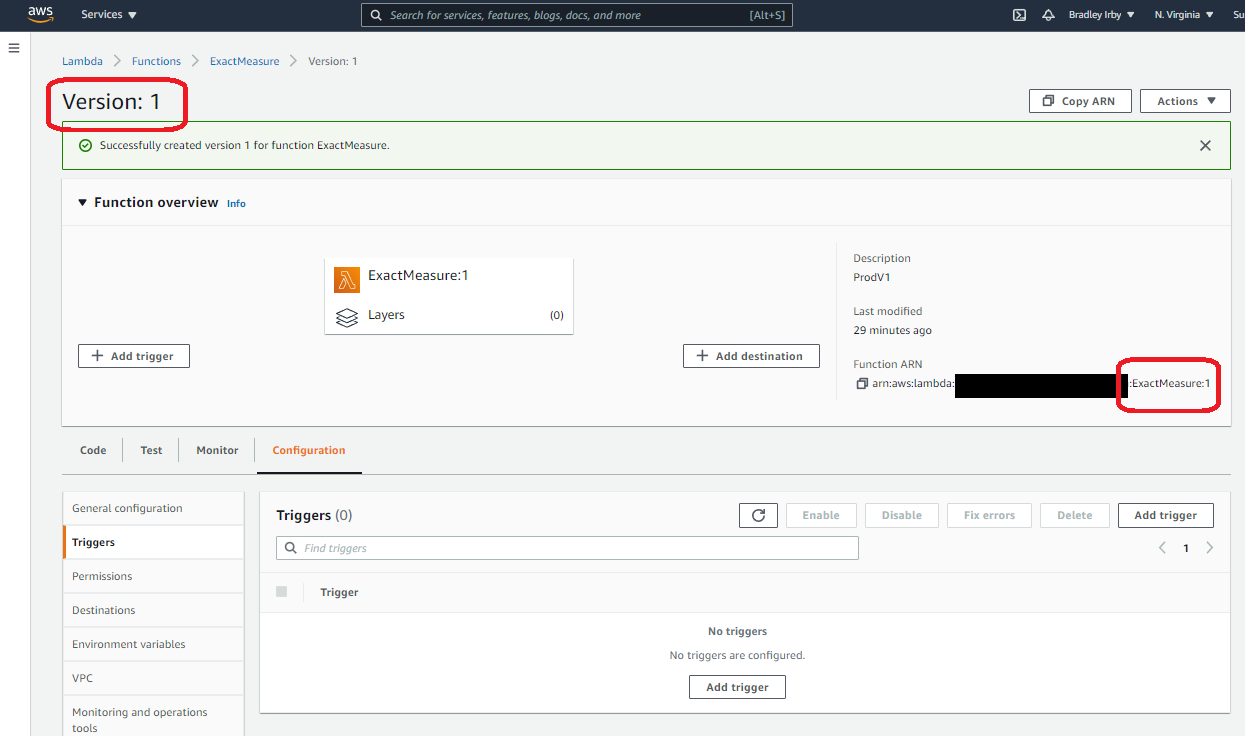
Publishing a new version of your Lambda is quite easy with the Versions tab of the Lambda function screen. Just click the Publish New Version button and you will be asked for an optional description. Enter something like “ProdV1” and press Create. Now you will be editing Version 1 of your Lambda. You can tell what version you are editing by the label in the top left corner, and also the Function ARN which now has a “:1” appended to it.
This version of your Lambda is now immutable. It cannot be changed so when you publish your Skill using this Lambda you will never accidentally overwrite your code.
Notice that the version of the Lambda has lost the trigger you added to the $Latest version. You need to add that trigger back just like you did when setting up the Lambda the first time.
We are not quite ready for production, though. If you publish your skill using this Version 1 directly, you are limiting your ability to handle small bugs that may come up later. Anytime you make a significant change to an Alexa skill you need to resubmit it for certification. Changing an endpoint counts as a significant change so to fix even the smallest bug would require a full recertification. If we use an Alias, however, we can get around this.
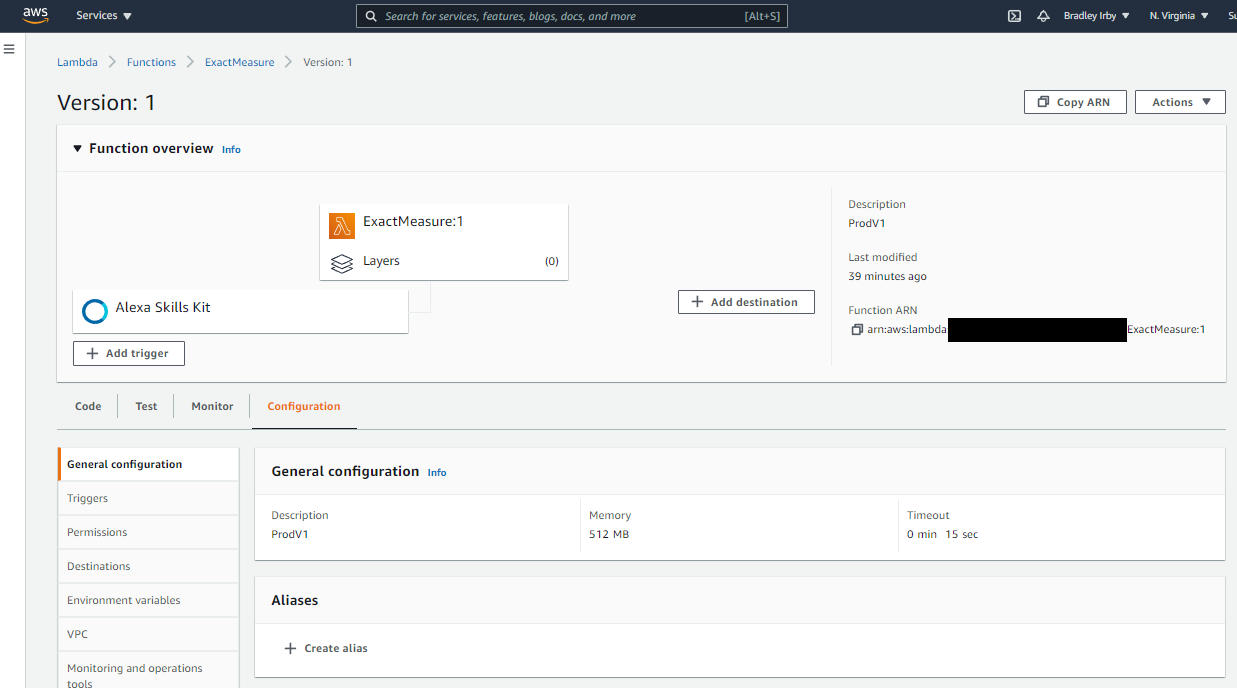
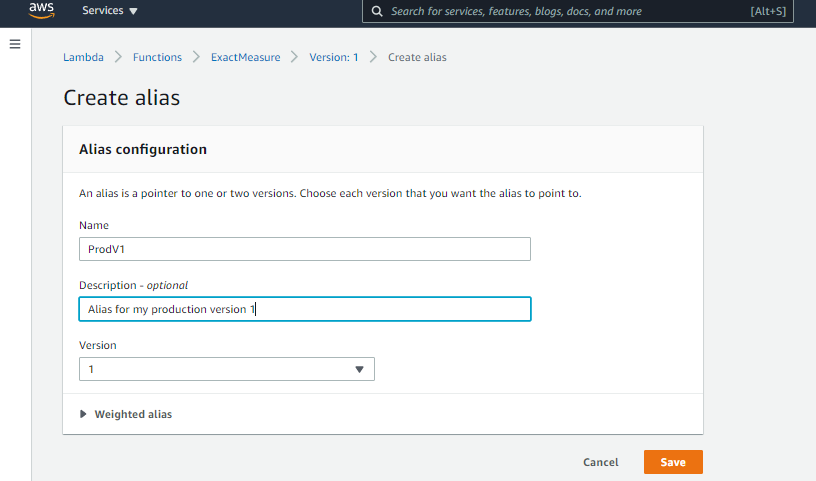
In your Lambda editing screen, choose the General Configuration in the left side menu. Press the Create Alias link and enter a name, like ProdV1. Make sure you point it at the proper version number (not $Latest). We are going to ignore the Weighted Alias for now. Click Save and you will see your new Alias. You must add the trigger one more time.
Note you did not need to add the trigger to the Lambda version itself like we did above. You only need to add the trigger to the Alias. I did so above for clarity and flow.
You should now see the fully configures Alias for the published version of your Lambda.
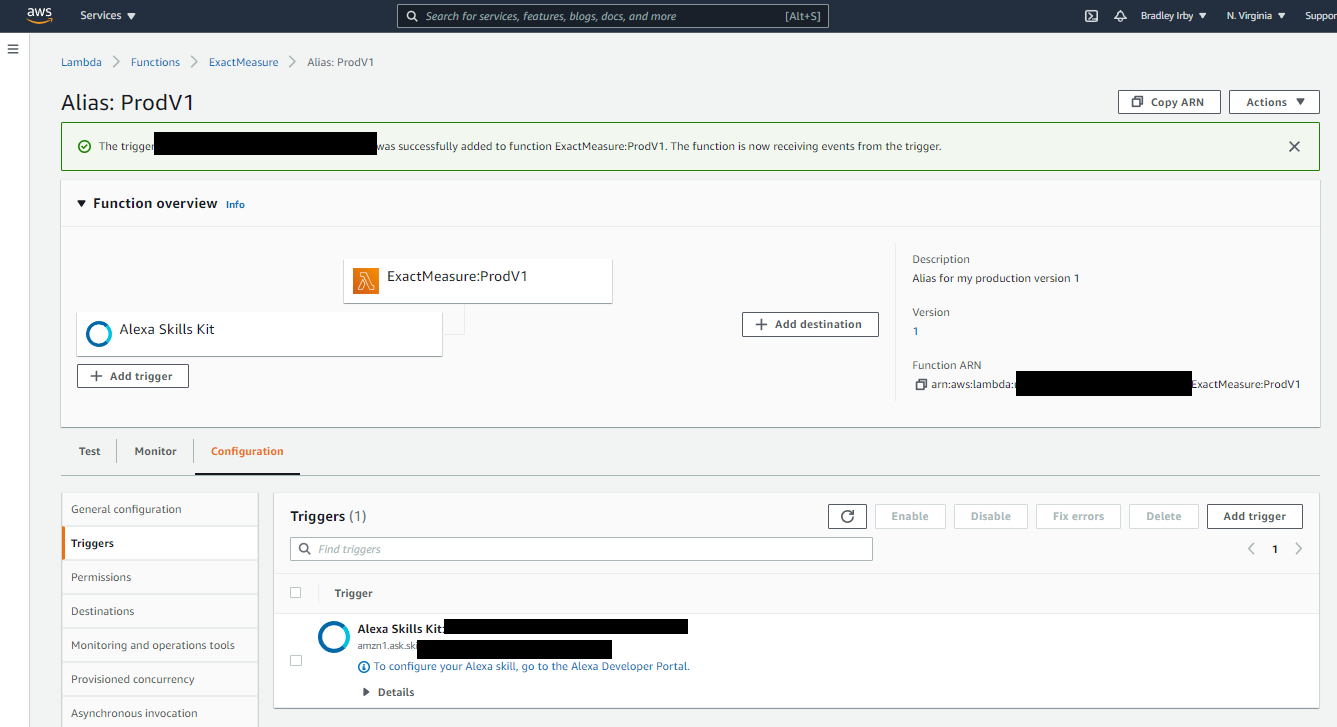
With our Alias ready we can update our Skill to point to this alias. Copy the Function ARN for the alias and update the endpoint for the skill. You are now ready to submit for Certification.
After Getting Certified
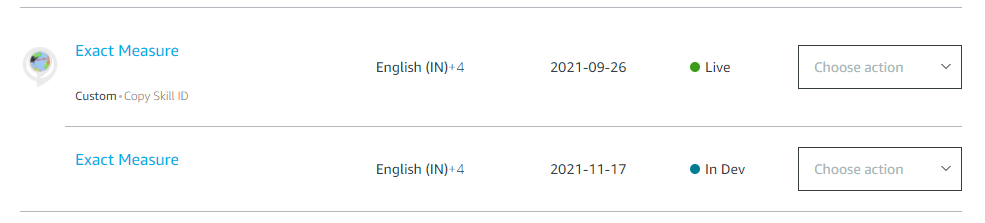
After you have gone through the certification process for your skill, you will see 2 nearly identical skills in your list. One has a status of Live and the other In Dev.
The Live skill is read only – all you can do is view or delete it. The In Dev version is the one you use when continuing development.
Initially both of these skills point to the same ProdV1 endpoint. In order to continue development on your skill, you must edit the In Dev skill and point it back to the $Latest version of your Lambda so it will get the new code changes. Once that is done you are ready to continue working on your next feature release.
Fixing Small Bugs
Fixing small bugs in production is a simple process thanks to our Alias. Edit your Lambda code and publish to $Latest as needed. When your bug is fixed create another version of your Lambda as described, then change your Alias to point to the new version. Your skill is instantly updated with no need for recertification.
This works if the bug is just in the Lambda function. If your bug fix includes any changes to the Skill configuration, you will have to go through a full feature release in order to fix it.
Releasing a New Feature
Releasing a new feature is a bit more involved than a bug fix due to the recertification process needed. The process for the Lambda function, however, is the same as when fixing a bug.
Edit your code as necessary to add the new feature. Also update the skill configuration as necessary. By this time you should have changed the endpoint of the In Dev skill to point to the $Latest version of your Lambda.
Once your testing is done create another version of your Lambda. Create a new Alias called ProdV2 or something similar and point at the new Lambda version. Change your In Dev skill to use the new Alias, and submit for recertification.
The old version of your skill will continue to work while the new version is being certified. If you chose to auto-release when certification completes, then the new version of your skill should become live within a few days of submission.
Leave A Comment